Having clean and nice-looking nails is not only important for beauty but also for personal hygiene. While professional manicures are an excellent treat, how to give yourself a manicure at home is a great skill to have, plus it’s cheaper. This guide will take you through all the basics of DIY manicures so you have the tools and techniques to achieve the elegance and polish you would in a manicure salon—but without leaving your own home. This article will help you understand the entire process of at-home nail care from preparing your nails and applying polish to taking care of your nails afterwards. If you are just starting out or want to revamp your current routine, you will find useful tips in this article.
What is a basic manicure and why should you get one?

Grasping the idea of a standard manicure
A standard manicure is relatively simple and easy, but its an effective procedure with regard to the care of nails. It focuses on cleaning and filing the nails and shaping them properly, then moisturizing the skin as well as the cuticles. Sometimes, a base coat, nail polish, and a top coat are used to complete the process. Apart from the basic benefits one would expect, a standard manicure also improves proper nail care and strengthens the health of the nails so they can survive greater levels of stress without breaking. It is a very good form of self care that will improve grooming and increase self esteem, all while ensuring one’s nails are neat and healthy.
Advantages of Regular Maniucures in Nail Care
Keeping a regular manicure schedule provides several advantages that goes more than simply improving the appearance of your hand fingers. First and foremost, proper nail length and strength helps to eliminate common nail problems such as chipping, breaking, splitting, and fragmentation. During a manicure, cleaning and trimming processes are used which lessens the chance of getting bacterial and fungi infections because of poor sanitation, thus guaranteeing healthy nails. Moreover, during a manicure, moisture oils and creams are applied which keeps both the cuticles and nails hydrated and also prevents dryness while promoting healthy growth. Regular exfoliating dead skin around the nails fosters better circulation and promotes healthier nails beds. Last but not the least, indulging in manicure for self beautification can also make you feel relaxed and greatly improve your overall health.
How often should you get a basic manicure?
I as on know the best guidelines on self-care, especially when it comes to the upkeep of our nails. Personally, I think a comprehensive manicure for your nails every fortnight ought suffice. I think there is no issue with getting them done more often as long as it’s affordable. But I would strongly suggest not skipping on the self-care treatment as it truly works wonders. Having that basic manicure done could guarantee that I haven’t let my nails grow enough for them to start breaking as well as not giving them enough time that I have to be concerned because they are prone to splitting. It’s this balance that ensures that my nails remain clean, healthy, and in shape. Taking all of this into consideration, its up to your lifestyle at the end of the day as well as if you are in fact prone to breaking your nails or if they grow rapidly but I have found applying a set schedule with a basic manicure has resulted in my nails appearing strong and in good shape all the time. This is how I manage to make manicure and self-care a routine, and in my opinion, truly helps me feel relaxed and more rejuvenated.
What are the essential steps in a basic manicure?

How to Clean and Polish Nails: A Step-by-Step Guide
Before putting your polish on, make sure to take off any old polish with a nail polish remover. This will allow for a smooth base to put the polish on. Make sure to clean the nails properly with soap and water, making sure no dirt is left behind. Once that is done, dry it off with a soft towel. To finish off, make sure that you prep your nails, as that lubricates them for the final look without having to worry about the health of the nails.
How to Shape and File Your Nails
First, pick the nail file that has the right grit for your nails. For your hands’ nails, choose a medium or fine grit file. Next, the file has to be held at an angle and put into use in a single direction. To avoid nail splitting, sawing should be avoided. The nail can then be shaped into a desired style, which can be either round, square, or oval. After a preferred nail shape has been achieved, a buffer can be used to smoothen any rough edges present. In addition to smothering nail ridges, buffing improves the appeal and eliminates any chances of breaks or snags.
Moisturizing and cuticle care
I make sure that I do not cut my cuticles. Instead, I push them back with a blunt object so that my nail beds look healthy. To make the process comfortable I use a cuticle stick along with oil. After I take care of my cuticles, I make sure to apply olive oil based moisturizer on my hands and nails. Moisturizing them on a regular basis not only improves their appearance, but also their health. This is my personal form of self-care which is very refreshing.
How can you perform a basic manicure at home?

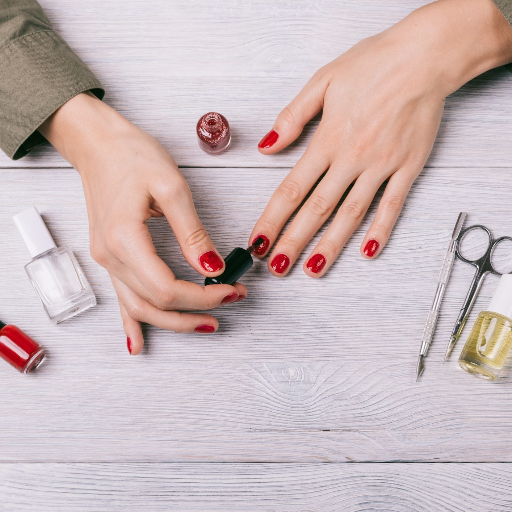
Necessary supplies to do a DIY manicure
- Nail clippers – To cut nails to a suitable length.
- Nail file and buffer – To shape nails and smooth the edges or surfaces.
- Cuticle stick or pusher – To gently push back cuticles for a neat appearance.
- Cuticle oil – To nourish the cuticles and improve nail health.
- Moisturizer or hand cream – To ensure that the hands and nails remain hydrated.
- Base coat – To shield nails from stains and help in adhering polish better.
- Your favorite nail polish – To paint on for a personal touch on the manicure.
- Top coat – For sealing and protecting the nails from scratches while adding gloss.
Basic manicure procedures to do at home
- Use a gentle polish remover to take off any previously applied polish.
- Shape and file your nails to the desired form, then buff to smooth out the surfaces.
- Place your hands in warm soapy water for a few minutes to soak and soften the cuticles.
- Gently push the cuticles back with a cuticle stick and apply cuticle oil to nourish them.
- To guard against staining and prepare for polish, apply a base coat on your nails.
- Two coats of the polish ought to be applied, permitting proper time to let each coat dry.
- To clarify, finish with a coat of polish to improve the shine, retention, and overall quality of nail polish application.
- Lastly, use a good moisturizer to enhance the hydration level of your skin and nails.
Nail polish tips that can yield great professional results from your work
- Be extra sure that your space is clean and well lit so that you can work carefully and avoid making a mess.
- Make sure you are neat and clean in every single step. Take your time while putting on nail polish, cutting, and even filing it. It all matters.
- Purchase best products such as nails polish, cuticle oil, and the likes to maintain the nails and achieve a perfect finish.
- Adequate amounts of nail polish should be reserved to provide proper retention without the risk of smudging or blurry nails.
- Put your tools through sanitation processes after every use to attain cleanliness and optimal use.
- To gain confidence and build up acrylic nails, you have to create the perfect DIY manicure by practicing.
What types of nail polish should you use for a basic manicure?

Nail polish vs gel polish: Choosing the best option
Regular polish is a very easily applied and can come in different forms such as matte or glossy. It dries on exposure to air and can be easily removed using nail polish remover. Gel polish, on the other hand, provides a more durable and chip resistant finish but must be cured with a UV or LED light and removed with special gel polish removers. For basic manicures maid with a dry polisher or any form of regular polish is more suitable and easy to use. For tough and long lasting manicures, gel polish is the best option.
The Importance of Base Coats and Top Coats
Nail base and top coats are the two components that make a manicure look professional and last longer. A base coat is the first layer of nail polish applied, and it serves as a protective layer for the natural nails. If you apply darker colors, the base coat also prevents staining. A base coat can also help the nail polish to adhere better, thus reducing the possibility of chipping. A top coat follows after the final color coat has been applied, and it seals in, protects and adds shine to the color while making the polish last longer. For those who don’t want a glossy finish, a matte top coat can be used instead. It is advisable to apply both base and top coats to achieve a professional look and longer-lasting result of the manicure.
Ways To Lengthen the Life of Your Manicure
There are few practices I adapt to keep my manicure intact for a longer duration. I always start with removable cuticle oil and ensure my fingers are free from any product. This makes it easier for me to clean and file down my nails. I also take my time to apply and dry a high-quality base coat. Applying medium set polish is a must. On top of applying the second coat, I also make sure I completely dry it first minute. After that, I finish It all off with a thin layer of a strong top coat which sets everything in place. It all adds shine to the nails and gives them an extra layer to battle chipping. I also try to stay away from hot water and potent chemicals to keep my manicure in place. Covering it up every few days with a fresh layer maintains it longer and saves it from any external damage. Following these little steps is what allows my manicure to be flawless for such a long time.
How does a basic manicure differ from other types of manicures?

Comparison Between Types Of Manicures: French Versus Basic Manicure
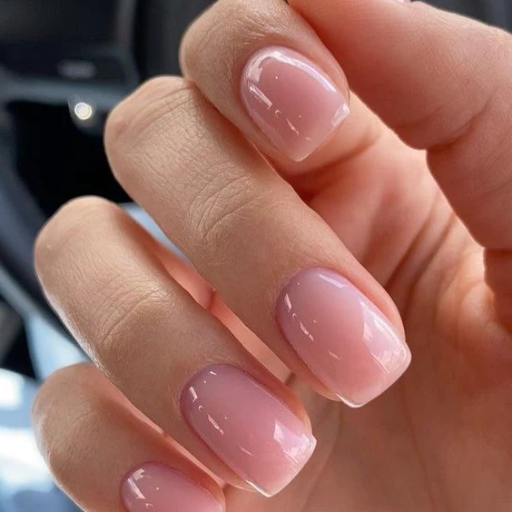
Basic manicures tend to involve simple nail care and polish application that include cleaning, nail and cuticle maintenance, nail shaping, and buffing. The usual procedures for this type of manicure encompass trimming nails, filing and buffing them smooth, hand massage, and polishing the nails using one single color. In contrast, a French manicure requires greater attention to detail. It stands out for its signature white tips and natural or light pink bases that together form a sophisticated set up. A French manicure is more accurate than a basic manicure which on the other hand is more casual. As with a French manicure, a basic manicure is more elegant and impressive, adding charm to formal events. They both maintain care for the nails but meet different decorative needs.
Basics versus Gel Manicure – Understanding the Differences
Basic and gel manicure differ in two major aspects, the polish type and the curing techniques. While basic manicure encompasses standard nail polish that is air-dried, a gel manicure utilizes a special gel polish that needs to be cured under a UV or LED lamp. The curing process allows the gel polish to harden and become more durable and chip resistant, thus lengthening the mileage of the manicure to roughly two weeks. In addition, gel manicures also feature a high-gloss finish that does not chip off during the use period. However, gel polish removal requires soaking the nails in acetone, which is often more time-consuming than removing usual nail polish. Despite the little effort needed for new polish to get rid of the old one, gel manicures are a perfect solution for those who are looking for lasting and tough color.
Looking at other trending styles of manicure, dip powder and shellac
Dip Powder and Shellac manicures have become commonplace as they attend to different user’s needs. Dip powder manicure entails dipping the fingernails into a bowl filled with colored powder and sealing it with a clear layer. It does not require UV or LED light, therefore is very very good for people who try to avoid such lamps. Dip Powder manicures are exceptionally strong, frequently lasting from three to four weeks while remaining resistant to chipping. They are very suitable for people looking for enduring results. Like gel manicure, it is done by soaking the nails in acetone to remover.
Shellac , unlike anything else, is a blend of gel polish and shelf nail polish. With Shellac an individual can get a glossy finish that is also chip resistant, it uses the same curing technique as gel manicures. It is easily removable because it does not require as much soaking time in acetone. This makes Shellac more beneficial compared to dip powder or gel polish. In the end it all depends on the aesthetic goals and desires of an individual whether to go with Dip powder or Shellac.
Reference sources
Frequently Asked Questions (FAQs)
Q: What are the different types of manicures available?
A: There are several Quarantine activitiesone can take. These manicures are all accommodations with standard and modern pedicure tools. There are some which include: french manicure, gelike manicure, acrylic gel manicure, and the dip powder manicure. In charge of these functions and even goes as far as assisting manicure includes washing, cutting, and varnishing the fingers’ nails. Standard manicures do require immediate attention. Dip powder manicures tend to be more durable that side and It also gets rid of the necessity of curing under a UV light and provides much faster result than standard dip powder systems.
Q: What are the basic steps for a DIY manicure?
A: The basic steps for a DIY manicure are: 1. Let the nail polish dry. 2. Remove the previous nail polish. 3. Shape the nails into the desired style. 4. Soak your hand in warm water for a few minutes. 5. Moisturize. 6. Apply a base coat on the nail. 7. Polish the first color on the nails 8. Wait until it completely dries. 9. Polish your nails with the transparent paint. 10. Apply nail oil with the dropper on your cuticles if you want. Follow these steps will give individuals a more skillful manicure at home.
Q: What factors should I keep in mind when selecting nail polish for an elegant manicure?
A: When it comes to selecting polish for simple projects, one needs to think of a few things like the event, time of the year, as well as skin tone. One should always ensure that the polish quality is perfect. Simple nail designs are best done with neutral shades and bold colors can be used for special effects. Also consider the type of finish (matte, glossy, or shimmer), and choose nail polishes that are best for long wear.
Q: How does gel nail polish differ from regular nail polish?
A: Regular nail polish and gel nail polish differ in various ways. Gel polish is much stronger as it does not chip and can last for almost 2 weeks without any damage. Regular nail polish takes a good 15-20 minutes to dry. Most gel nail polish dries under a UV or LED light. The regular polish takes anywhere between 3 to 5 days to last. Also, gel polish is thicker than regular nail polish and has a glossier finish. Sadly, gel polish has the downside of needing to be professionally stripped off or removed with special techniques to not damage the nail bed.
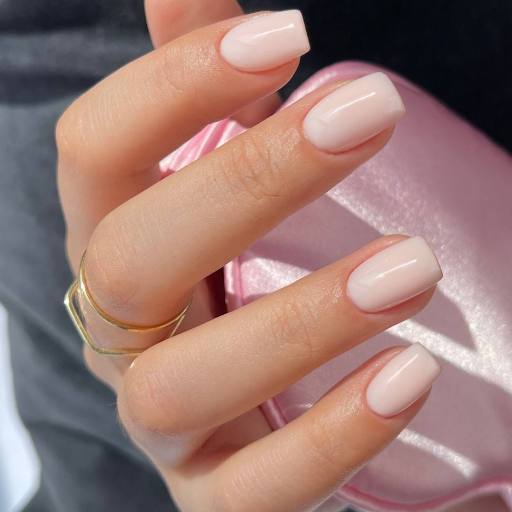
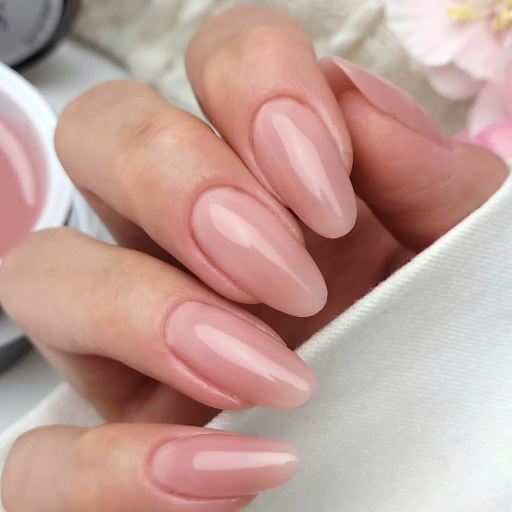
Q: How do I use a basic manicure to make my fingers look longer?
A: To make your fingers look longer, try these tips: While doing a manicure, use oval or almond shapes as nail tips instead of the square shape. Paint your nails with light or nude polish. Apply a vertical stripe of lighter polish down the center of each nail. Maintain the length of the nails at a moderate size. Push back cuticles to reveal a greater proportion of the nail bed. These steps give an illusion of length so your fingers look slender and more elegant.
Q: Which tools do I need for a basic manicure?
A: As for a basic manicure, these are the tools that you will need to get: Hand lotion or cream, nail brush, nail polish remover, buffer, base coat, polish, top coat and cuticle oil are some of the tools. Optional ones include a soak bowl, scrub for the hand, cotton balls or pads. So long as you have these tools, achieving a professional manicure at home should be no issue.
Q: What measures should I take to assure my nails are strong as I perform a manicure?
A: To answer your questions, here is a manicure routine that will promote stronger nails for you over time: Use a strengthening base coat, or preferrably a nail treatment, to make the polish last longer. Rub cuticle oil into the nail bed daily. Limit contact with water and chemicals and try to recondition dry hands. Biotin supplements, protein and vitamins are always recommended, as well as a healthy and balanced diet. Switch to glass nail files and stop using emery boards. Do not pick or bite your nails and try to get the occasional paraffin wax. While all of these advanced practices and tips will not work overnight, they will promote healthy, strong nails over time.