
The French gel manicure epitomizes the combination of glamour and longevity, achieving it is an art unto itself. In this guide, I aim to provide all information related to the procedure starting from the required materials, the techniques, and to the most sophisticated finesse that will polish your nail art. It does not matter if you want to take your DIY skills to the next level or are trying to hone your professional skills; this article caters to anyone willing to learn how to turn natural nails into beautiful masterpieces. Get ready to cover every phase of the process, knowing that you can accomplish the same stunning outcomes as nail salons.
What is a French Gel Manicure and How Does it Differ from Regular Manicures?

Comprehending the Principles Behind French Manicure Designs
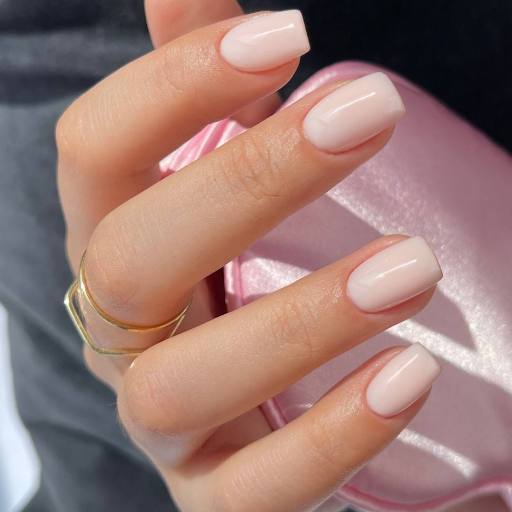
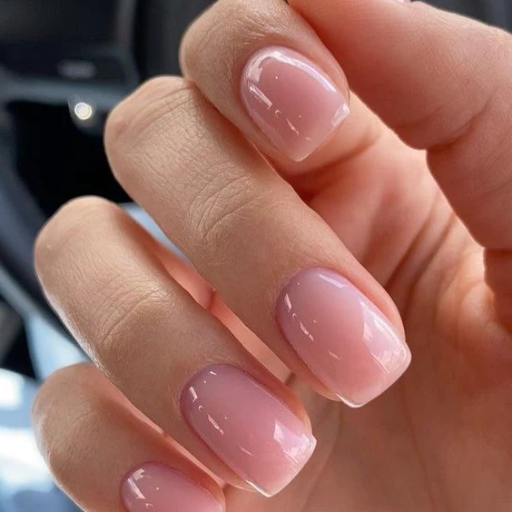
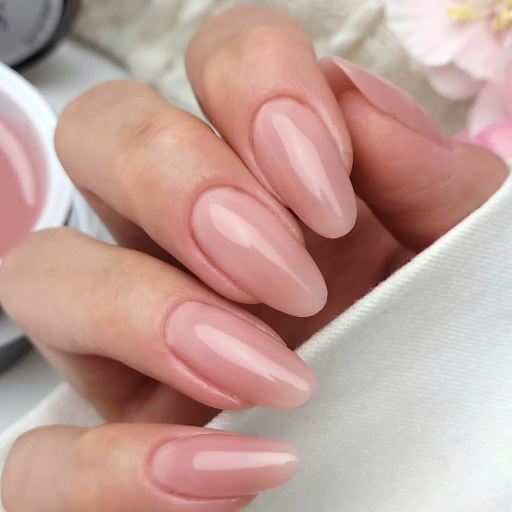
A French gel manicure is an advanced version of the French manicure that looks more polished and lasts longer. Unlike traditional French manicures, where regular nail polish is used, a French gel manicure utilizes gel products that are cured with UV or LED light, making them more durable and shinier. This style is characterized by a clean and refined look that has a nude or natural colored base and a crisp white tip. The polish provides further strength to the nails, making it ideal for those prone to chipping or for a person wanting a manicure that looks fresh for long periods. French gel manicures provide a pristine finish from the skilled hands while giving a longer life as compared to other regular manicures, which tend to require touch-ups every so often.
Gel polish vs. Regular polish: Essential Discrepancies
The most notable distinction between gel polish and regular polish is the formulation and durability. Gel polish can be set using UV or LED lights, which makes it durable and long lasting, typically lasting up to three weeks without chipping. In contrast, regular polish sets by air drying and usually lasts only a few days before showing wear and chipping. In addition, gel polish tends to look glossier and more professional whereas regular polish is relatively easier to apply and remove. Another important difference is in the removal process; gel polish needs to be soaked off with acetone and requires careful attention to avoid damaging the nails, while regular polish can be removed quickly using nail polish remover. Often, the choice in between gel and regular polish is based on individual preference, lifestyle, and maintenance commitment.
Benefits of choosing a French gel manicure
There are many reasons why a French gel manicure is among the most sought after nail treatments. One of the primary benefits is its extraordinary longevity; the gel polish provides a flawless, chip-free finish for up to three weeks, which is perfect for people who lead busy lifestyles and have very little time for maintenance. Moreover, like all French manicures, the primary neutral color with white tips is always in style and can be worn to formal events or even on a daily basis. Besides looking good, the nails are also easier to maintain because the gel adds strength and durability to the nails, minimize the chances of breaking. In addition, the long-lasting glossy effect makes the nails look professionally done for a long time. With all these features, a French gel manicure is the best option for those who want beautifully crafted but low maintenance nails.
How to Achieve the Perfect French Gel Manicure at Home?

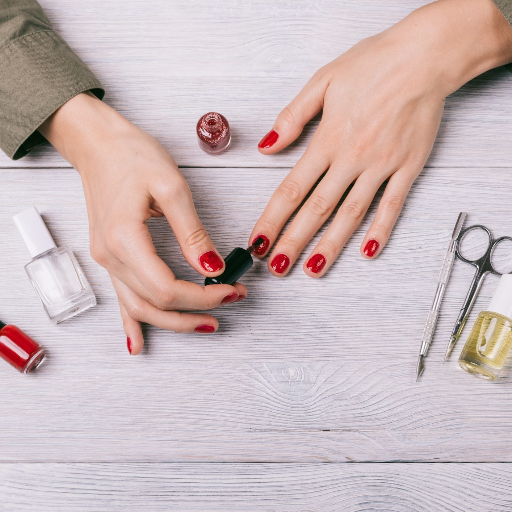
Important tools and product for a DIY French gel Manicure
To accomplish a French gel manicure at home, you will require the following products: . Utmost care ought to be exercised in regard to these items. A rigid lamp designed to emmit UV or LED rays, base coat, pink or nude gel polish, white gel polish, a top coat, a file, a buffer, a cuticle pusher, and lint free wipes. Take time to prepare your nails first, which includes shaping, buffing, and cuticale push back early. Base coat applicaton is the next step after the curing subphase is completed. Next, sheern pink or nude gel color application as a base coat must be performed followed by curing. Use white gel polish to create clean and curved lines followed by curing. Top coat must be applied at the last step, but do not forget to cure one more time. Wiping the nails with alcohol and lint free wipes encapsulates the magic of transforming nails into salon quality French gel nails.
Step-by-step guide to achieving balance in smile lines
- Prepare a guide tool: Use a French manicure guide sticker or a fine nail art brush for precision.
- Manually restrain your hand: Lock your painting hand on top of a horizontal structure to bestachieve posture maintainence.
- Create smooth strokes: Swipe the white gel polish onto the tip of the nails in one clean stroke or use multiple short, connected strokes.
- Perfect the shape: Use a small brush dipped in acetone to refine the smile line, and define it prior to curing it.
- Cure and finish: Cure under the lamp, then proceed with the top coat for a complete appearance.
Tips for long-lasting results
To make it last longer, I focus on the right preparation and maintenance. I always ensure that I thoroughly prep my nails by cleaning, buffing, and pushing back my cuticles. This allows the gel to adhere better and prevents lifting over time. When I apply the gel polish, I always use thin layers to prevent bubbling as well as ensure that every coat is cured properly under the lamp. I also make sure to always seal the edges of my nails with the base coat, polish, and the topcoat which prevents chipping. When my manicure is complete, I avoid using harsh chemicals and exposing my nails to excessive water – these weaken the gel. I also apply cuticle oil on a daily basis, which keeps my nails hydrated and healthy, allowing me to achieve a long lasting beautiful result.
What Are the Best Techniques for Applying French Gel Polish?

Nail preparation techniques done properly
Your nails should be prepared in the appropriate way in order for a French gel polish to be done beautifully. Start by taking off old polish if the nail is done already and washing the hands to remove oil or any other chemical residues. Then, trim and style your nails to the appropriate desired length and shape that you prefer. Push back your cuticles with a non aggressive cuticle pusher so that the nail bed is as clean as possible before the nail polish is applied and can be used with ease. Puffs the upper surface of the nails with a nail buffer. A nail buffer is less aggressive than other types of buffers and helps to beautify the nails in a non aggressive fashion. It helps polish nails by entering fine lines around the surface of the nails with abrasive material without filing the area to much, thus making it easier for polish to stick to the nails. Clean the nails after in order to get rid of anything else that could be left behind including vapors of oil and dust. The French gel polish is more durable and chip-free nails after application thanks to perfect nail preparation.
Putting on a base coat, color, and top coat with perfection
French gel polish application involves intricate detailing. Each nail must first be covered with a thin layer of base coat while avoiding cuticles and side walls of the nails. Base coat should be cured under a LED or UV lamp as per manufacturer guidelines, wherein the base coat needs to be cured as strong color foundation. It is now time to use sheer or nude colored gel polish as base color from which the classic French manicure look stems. In order to prevent unevenness, it’s better to work in thin coats while curing each layer under the lamp. A nail art brush or precision tool with thin diameter can be used to paint the effortless smile lines, in a manner that follows the curve of your nails. The edges need to be smooth, so tips need to be cured later on. A good quality top coat capping each nail along the free edge to avoid premature chipping while curing. After the top coat is cured, nails must be whiped with a non-lint pad and cleanser to get rid of the sticky layer so that brilliant glossy finish can be enjoyed.
Creating crisp French tips with gel polish
For perfectly sculpted French tips, follow these instructions closely to achieve the best outcome. First make sure that your base color is fully cured and has no rough edges. For the precise white tips, use a thin nail art brush, or a French manicure brush which is made specifically to retain the art. Make sure to dip it into the white gel polish while removing any excess to prevent smudged or uneven application. Using the tip of the brush, start from one side of the nail and slowly and carefully sweep the brush across the tip of the nail while tryin to follow the smile line. If you want more control, you can use French tip guide stickers which will act as a stencil. After all the tips have been painted, check if all the nails are balanced and does not require further adjustments, if so her them. Then cure the white tips under an LED or UV lamp following the polish instructions to set the design. If needed add a second coat of thin white polish and cure it again. Finally seal the tips with a top coat while make sure to cap the edges for durability. These tips and compliments will perfect your French tips and give your manicure the fresh touch it needs.
How Long Does a French Gel Manicure Last and How to Maintain It?

Factors affecting the longevity of your French gel manicure
A myriad of elements from 2-3 weeks can dictate the life span of a French gel manicure, consider nail growth, product quality and workmanship as just a handful of contributing factors. Try not to expose your nails to heavy chemicals and water for an excess length of time. Use cuticle oil frequently to give your nails the moisture needed to prevent chipping. During housework, wearing gloves is a wise option to maintain the glossy look and in turn, prolong wear.
How to Maintain a French Gel Manicure
Your French gel manicure can last longer if you remember certain maintenance tips. Begin with keeping the surrounding skin well moisturized by using cuticle oil daily; this will keep the skin from going dry and the gel from getting brittle and cracking. Secondly, train yourself to not use your nails as tools to scratch or open something, as this often leads to chips or polish lifting, which is kind of annoying. If you spot a lift or chip, you can save peeling from spreading further by carefully filing the edges. Moreover, you can keep the polish from losing its shine by putting a thin layer of no-wipe gel top coat every week. When it comes to removing stains, always use non-acetone polish remover to prevent any surface damage to the nails. In addition, remember that over-exposure to cleaning solutions, hit and cold water, and extreme temperature can negatively affect the pristine condition of your manicure. Proper care towards your French gel manicure can certainly allow it to shine longer than the expected duration.
When To Consider A Touch Up Of Remove The Polish
When I know it is time to either touch up or remove the polish, there are a few signs that I keep my eyes peeled for.Signs such as a growth at the base of my nails along with chips and cracks are indicators that I need to maintain the polish on my nails. At times, I may even notice the polish losing its glossy sheen, which is also an indicator of a lack of strength in the nails and requires taking the necessary steps to refresh or remove the polish completely. In all cases, I try best to maintain a balance where I am addressing the health of my nails while also keeping the manicure elegantly polished.
Are There Any Risks or Downsides to Getting French Gel Manicures?

Possible effects on the health of natural nails
As much as the French gel manicures stand out due to their elegance and long lasting effects, they may put the health of your natural nails at risk if managed poorly. Possioble impacts could be nail thinning or weakening that can result due to many cycles of gel application and removal buffing or soaking in acetone for long durations. Furthermore, peeling polish off rather than using correct removal procedures will lead to nail plate damage resulting to nail flaking or splitting. Excessive reliance on gel manicures over time without breaks may enhance the fragility of nails due to decreased ability to recover. Other than following checklists, nails ought to be given some rest and unprofessional attempts at removing them need to be avoided. Regular moisturization treatments on the nails as well as cuticles may assist in providing the necessary aid to natural nails to ensure their comfort and structure.
Busting myths around gel manicures
One common misconception shard by many is that gel manicures ruin natural nails. This is partially true, as improper application and removal will always cause some damage, but when performed by a qualified professional and complemented with appropriate aftercare, gel manicures are completely fine and can even add some protection to nails with daily use. Others believe that nails require rest or a period where they do not get worked on. Nails, comprised of keratin, a type of protein, do not need respiration, so, no nails do not require oxygen. They do need hydration and care, like cuticle oil, to remain healthy. Lastly, some think that the UV or LED lamps used to cure gel polish are dangerous. Even though modern lamps do emit a small amount of sunlight, it is suggested to use sunscreen or UV protecting gloves. Undeniably, learning the truth behind these statements will greatly improve the overall gel manicure experience while maintaining the strength and health of nails.
How to minimize damage to your nails
Every time I try to get my nails done with gel nails, I always adhere to specific protocols that help protect my nails. I’ve learned from experience that the best way to not get damaged is through proper application and removal of gels. Personally, I always ensure that a trained professional applies my gels and that they’re removed carefully. NO peeling or picking! This has been the difference maker when it comes to protecting my natural nails. In addition, I don’t fret over giving my nails a break from the polish as I know nails are made of keratin, and are not living tissue, thus do not require oxygen. What I do prioritize is my cuticles, as using cuticle oil regularly keeps them strong and well nourished. Last but not least, I pay close attention to the UV or led light my polish is cured under. I either put sunscreen on, or use UV blocking gloves to safeguard my skin further. Following these habits ensures I not only enjoy my gel manincs but continuously take care of the health of my nails.
Reference sources
Frequently Asked Questions (FAQs)
Q: What is a product description of a french gel manicure?
A: A French gel manicure is a sophisticated nail art technique which combines both elements of traditional French manicures, with polished white tips and a natural pink underlying base, and gel polish to create an exquisite long-lasting art. It was designed for anyone who appreciates timeless beauty, and this type of manicure’s appealing feature is its long-term results and an eye-catching stark white tip.
Q: How do I get a gel polish french manicure?
A: The perfect french gel polish manicure begins with a very basic, but essential manicure. Start with clean trimmed and filed nails, then apply the gel colour base polish. From there, the french tip can either be painted freehand style or with guides. Each layer must be cured under UV or LED lamp. By the end, apply a top coat to seal and shine the finish, but remember for best results, always visit a professional nail technician.
Q: What tools do I need for a french gel manicure?
A: To achieve a french gel manicure, you will need all the supplies required for basic manicure along with gel polishes like, a base polish, white polish for tips, and top coat as well, a UV or LED lamp for curing, French tip guides or forms for gel manicure, and gel polishes as well. Some brand names are, Shellac and The Gel Bottle Inc. and their products give professional results.
Q: How long does a french gel manicure last?
A: If the French gel manicure is done professionally, it has longevity of 2-3 weeks with no chipping or peeling. However, as with all good things, there is a catch, the longevity rests of the quality of products used, correct application process, and how well you treat your nails after getting them done.
Q: Can I create a french gel manicure at home?
A: Absolutely, if you have the necessary tools, and with some practice you can do it at home. For the best results especially when doing gel nails for the first time, it is best recommended that you allow a professional nail tech to help you out, because they know everything about properly curing the gel polish to prevent it from chipping.
Q: Do you know, if there are any changes to the French gel manicure style?
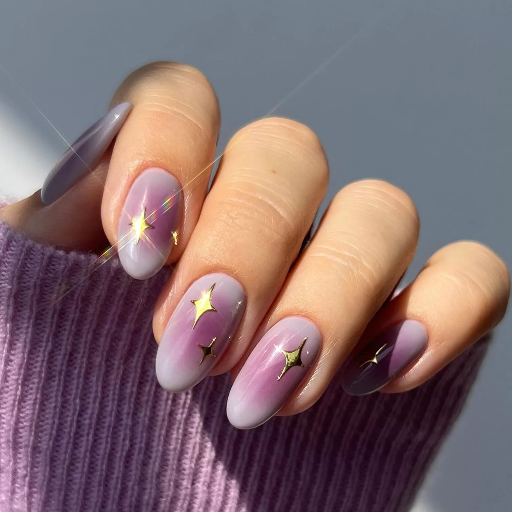
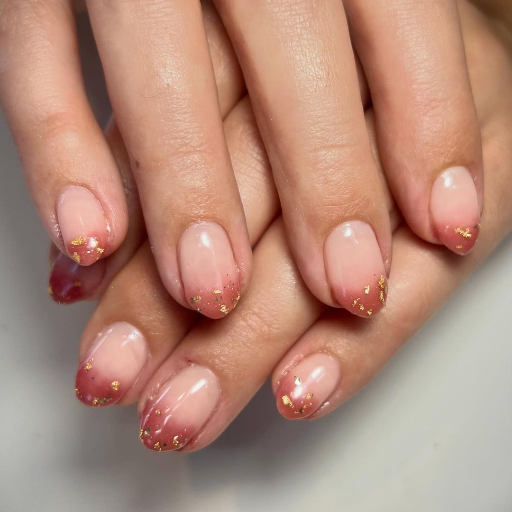
A: Certainly So, there is. A colored french manicure is a more vibrant twist of the traditional french look, using a variety of color tones instead of white for the tips. Pastel colours, glitter, or even an ombre effect are some popular choices. Different shapes of nails can also be sported with uniquely appealing french manicures.
Q: What is the procedure for taking off french gel manicure nails?
A: For those accustomed to the nail polish removal pads that usually come with nail polish sets, it may come as a surprise that the first step in this process involves getting out a file, but it is true. However, for instance, Unlike before, break the top seal of polish, which involves gently filing off the upper layer of polish, immersing a cotton pad into nail polish remover, and placing it onto gel covered nails, while also wrapping the rest of the finger in foil. After about 15 minutes, attempt to wipe the nail clean of polish and at this time, it should be easy. If you are not certain, it is always safer to let a professional cosmetologist remove the gel manicure, if you happen to wish your nails to be just as they are, buffed and polished.
Q: How safe is a french gel manicure for my nails?
A: Everything has to do with the approach you take. If you do a french gel manicure correctly and take it off correctly, then it is safe for your nails. However, if you do not apply or take it off properly, then it might just ruin your natural nails. It is wise to let your nails breath in between different gel manicures and also to hydrate the nails. If there are any issues, seek the help of a nail technician to know how to keep your nails healthy while getting beautiful gel manicures.