Getting flawless, long-lasting nails with a stunning finish is as simple as getting a gel polish manicure.Wondering how to keep your gel nails beautiful for weeks without any chipping, peeling or losing their shine? Ever since gel nails became a trend, many people and professionals have become avid users and have settled into a routine. If you fall into the latter category, this guide is stuffed with all the essential tips and information which can help you optimize your gel nails. From product selection to aftercare mastering, we will unveil professional secrets to ensure your gel nails capture attention and stay intact longer than ever. Prepare yourself to learn and unlock the secrets behind a perfect gel polish manicure.
What is Gel Polish and How Does It Differ from Regular Nail Polish?

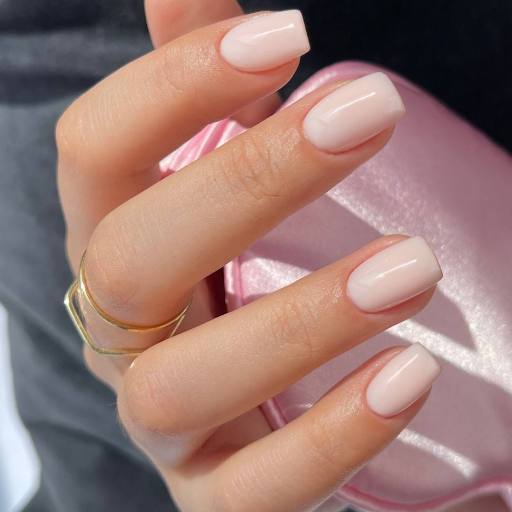
An example of nail polish that sets and hardens while curing under a UV or LED lamp is gel polish. Regular nail polish dries naturally, but gel polish requires curing to form a tough, chip-resistant coating. This coating can last two to three weeks without peeling or fading, unlike regular polish. Gel polish surpasses regular nail polish in quality as it provides a glossier finish and does not fade. On the contrary, gel polish does require a special removal process that involves soaking the nails in acetone to avoid damage.
The Primary Concepts of Gel Nail Polish
Gel nails polish is an innovative and long-lasting option for nail care when compared to traditional polish. Its beauty offers more than just aesthetics; it is durable too. Just like regular nail polish, gel nails are ‘painted’ on top of the nail, however, steps must be taken to place the hand under a UV or LED lamp afterwards so that the gel ‘polish’ is cured (set) and its shine proclaims a polished finish. This curing step forms a tough layer that is chip resistant and can survive the rough challenges of everyday life. This durability is why many people seek it out; it does not need to be redone frequently and remains vivid for weeks. For even more appeal, the polish is also high-shine and fade-resistant, adding a vibrant and stunning look. Not crushing, however, the application and removal processes must be done with care to ensure the health of the nails. This is important because the process of removal using acetone can be damaging if not handled delicately. Grasping these concepts is highly important for an enjoyable experience with gel nails polish.
Duration Comparison: Gel vs Regular Nail Polish
In the battle of lasting capability, gel nail polish wins over regular polish by a long margin. Gel polish is able to withstand wear and tear for up to two to three weeks on average due to its curing process under a UV or LED light. This creates a hardened, durable structure which regular polish does not have and only lasts five to seven days.
Recent market research states that approximately 60% of salon attendees prefer gel polish over regular polish because of its ease of use while washing dishes and most types of daily activities. Moreover, the “softness” of gel polish makes it less prone to cracking, giving it an advantage over traditional polish for those adherent to a more active lifestyle.
Gel polish is a popular choice for long lasting manicures, despite the need for a professional to apply it and longer removal times. This makes is an optimal solution for people who look for durability and prefer a sleak touch-free slender finish.
Using Gel Polish Benefit and Disadvantage
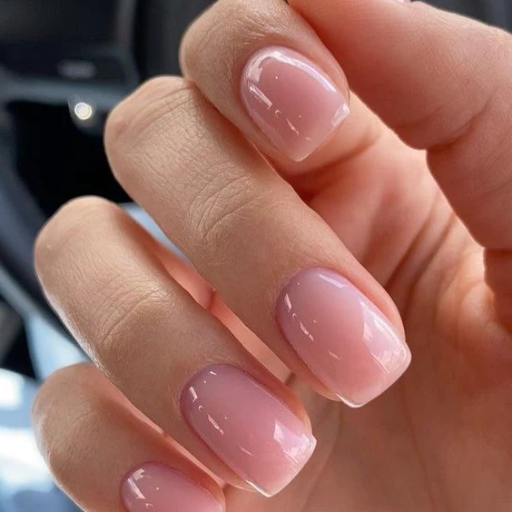
As a key benefit, gel polish is long lasting and pleasing to the eye. A polish wears down smoothly and remains intact for weeks on end. For people looking for long lasting manicures, gel polish is an excellent alternative as it doesn’t require yah maintenance for two or three weeks. Those who prefer looking professional at all times will love gel polish as it provides a well maintained look along with a professional sheen. This polish is highly recommended for people with active lifestyles too as it can withstand a great amount of tear and wear.
On the negative side, the polish requires a certain level of expertise to apply. Most people don’t buy portable UV and LED curing lights for home use and as such curing can be an expensive and difficult process that is better left to professionals. If not done correctly, the procedure can be time consuming and result in the loss of natural nails. Regardless of these challenges, claim stands true that is used out there, the finish and long lasting nature make gel polish the preferred polish for many.
How to Apply Gel Nails at Home Like a Pro?

- Prepare Your Nails: Begin with scrubbing your nails for dirt and oil. Shape your nails using a file and gently push back your cuticles.
- Apply a Base Coat: Take a gel seal coat and apply a thin layer followed by curing it under a UV or LED for the recommended duration from the product guidelines.
- Apply the Gel Color: Apply the gel nail color starting from the center applying a thin, even layer. Place it under the UV or LED lamp for curing. Repeat this step for a second layer for better coverage and cure again.
- Seal with a Top Coat: A gel top coat should be applied to the nail while curing under the lamp to seal the color, and go the shine finishing.
- Clean and Hydrate: Cuticle oil should be applied to help maintain hydration to fingers, while sticky residue should be cleaned off using rubbing alcohol.
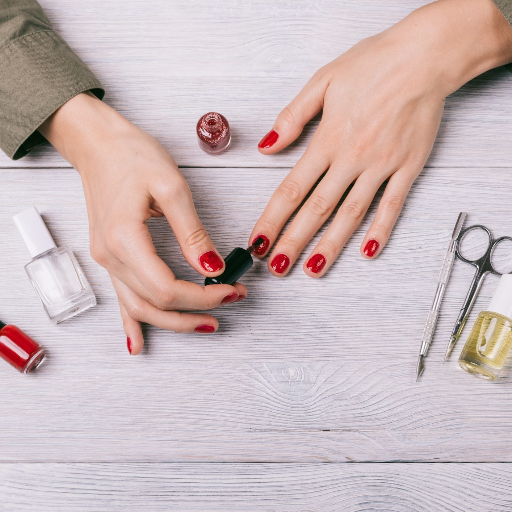
Essential Tools and Gel Products You Need
- UV or LED Nail Lamp: Capture a LED or UV nail lamp which is highly recommended and have the ability to deliver 36 watts at a minimum for faster and efficient curing alongside better results. Many brands are coming up with compact and multifunctional inkless nail lamps for curing on the trip.
- Gel Base Coat and Top Coat: A reliable base coat is important in safeguarding the natural nails and helping achieve a smooth application. A chip resistant top coat which adds shines instant does boast to completing the task. Research indicates that the performance and longevity is often improved when compatible base and top coats are utilized from the same brand as your gel color.
- Gel Nail Colors: Choose a reputable brand that sells gel nails for professional use only and that contains high-quality pigments along with long-lasting products. With the high demand for eco-friendly products, brands are now introducing vegan and cruelty-free gel polishes devoid of toxic substances such as toluene and formaldehyde, which is a step in the right direction.
- Cuticle Pusher and Clippers: Effective cuticle management delays lifting and contributes to a longer-lasting manicure. It is prudent to use tools made of high-grade stainless steel for cuticle pushers and clippers due to their durability and hygiene.
- Nail Files and Buffers: Use a 180-grit file to properly shape the nails and employ a buffer to polish the top of the nail for a clean surface before applying the gel. Also, all these tools are affordable and easy to find in shops.
- Rubbing Alcohol or Gel Cleanser: For cleaning any sticky remains after curing, use a solution of 70% and 90% isopropyl alcohol. A 70 to 90 percent concentration of isopropyl works great for keeping polish residue free of curing. Certain gel kits provide cleansers specifically intended for the task as well.
- Cuticle Oil: Hydrating your nails and cuticles post-manicure is vital to maintain overall nail health. Many popular cuticle oils are enriched with vitamins like E and natural oils such as jojoba or almond oil for added nourishment.
Mistakes to Avoid During a Gel Mani
- Not Prepping The Nails: One of the biggest goofs people tend to make is not properly prepping the nails. If the oils and grime are not cleaned from the nail, it will not properly stick. Studies show that cleaning nails with isopropyl alcohol increases polish life by 40 percent.
- Too Much Gel Polish:A lot of first timers tend to put too much gel polish. This is going to equal uneven curing and ultimately cause bubbling or peeling. To achieve the polished effect, nail hygiene specialists suggest applying thin, even layers of gel polish.
- Under Curing and Over Curing: These things, without a doubt, have the biggest impact on the end result. Studies state that under curing makes the polish too soft, whereas over curing causes discoloration. Make sure you have the right UV or LED lamp for the gel polish you are using, as recommended by the manufacturer.Overlooking Cuticle Care: Not pushing back the patient’s cuticles prior to applying gel polish will likely cause lifting. “It is best to avoid tighten the polish near the skin; otherwise, it could cause lift around the edges,” said the expert.
- Not Following Proper Gel Polish Removal Routine: Not soaking the gel polish off correctly and instead peeling it off will damage the nail significantly. Health data indicates that the best method to remove it is acetone, especially when you want to protect the nail bed from weakening or splitting.
Does Gel Polish Damage Your Nails?

If applied and taken off in the correct manner, gel polish will not damage your nails. Issues arise with more inappropriate techniques, like peeling the polish off or using too abrasive tools, as these may cause harm to the nail bed. Make sure to keep gel polish in professional hands who will remove it properly without causing soaking in acetones. Moreover, regular aftercare by moisturizing nails and cuticles helps strengthen and promote nail health.
Knowing the Effects to Your Natural Nail
With proper steps taken in applying and removing gel polish, natural nails should not be significantly damaged. Repeatedly using bad practices like scraping or peeling polish off leads to weakened nail structure which can make the nail prone to splitting and breakage. Frequently associated with nail polish removal, acetone can cause dryness to nails and the surrounding skin. To balance this, one must adopt a holistic approach towards maintaining. Strength and resilience must be earned, therefore moderate usage of nail polish and letting the nails breathe with breaks is essential, so as hydrating the bare nails aids in preserving optimum levels.
How to Reduce Nail Damage During Gel Manicure
- Pick a Specialist – To make sure proper procedures are followed, have a trained professional do the application as well as the removal.
- Nail Recovery Time – Allow time after a gel manicure to help your nails recover.
- Stay Moisturized – Surrounding skin and nails should have cuticle oil applied to them along with hand cream once a day to keep moisturized.
- Gentle Removal Techniques – Do not peel or scrape off the gel polish, but instead soak the nails with cotton balls dipped in acetone and wrap them in foil.
- Choose reputable brands – Non-damaging base and top coats, as well as gel polish, should have a reputable brand and not be gel polish of a random brand.
Restoring Weak Nail Beds After Gel Polish Usage
Nail beds require caring after gel polish use to ensure they are healthy and strong. First, make sure the nails are cut and filed to avoid trim damage. Apply nail strengthener regularly to help with weak nails and new healthy growth. Daily massage cuticle oil into your nail beds and use hand cream to maintain hydration levels of the skin. Change your diet to include biotin or take supplements to help from within. Most importantly, allowing your nails to go polish free for a couple of weeks will let them naturally regenerate. Following everything step will lead to healthy and strong nails in no time.
How to Safely Remove Gel Polish Without Harming Your Nails?

- File the surface of the gel polish – Gently file the top surface of the gel polish until the shine has been removed. This enhances the efficiency of the remover’s penetration.
- Use acetone soaked cotton balls – Place small cotton balls in acetone and put one on every nail.
- Wait 10-15 minutes – The gel polish should start breaking down in 10 to 15 minutes.
- Gently remove the polish – With a wooden stick or printed equal cuticle, softly lift the polish from the sides. Polish should be softened.
- Hydrate your nails – Wash your hands thoroughly and apply cuticle oil and hand cream.
Tools Required to Remove Gel Polish at Home
- Acetone – Must have a pure acetone thinner when removing the gel polish.
- Hydrate your nails – Esure to wash the napkin and modified oil and hand cream to be added at last.
- Gel foil – Used interchangeably with papers for cutting to small strips that can be used to cover nail dry area.
- Nail file – Important for gently buffing the surface of the gel polish prior to applying acetone.
- Cuticle oil and hand cream – For moisturizing and nourishing the skin and nails after the procedure is done.
Post-Removal Nail Care Tips
After taking off polish, I focus on restoring moisture and dealing with their strength issues. To keep my nails healthy, I tenderly apply cuticle oil daily and massage it to help circulate blood flow. Alongside using the previously mentioned, I also use a nourishing hand cream regularly to keep my skin supple and nails healthy. To avoid any breakage, I keep my nails trimmed and occasionally buff them for a smooth surface. Furthermore, I allow my nails periods of time free from polish to enable them to recover and reinforce themselves.
Choosing the Best Gel Top Coats and Base Coats for Your Gel Nails

It’s best to focus on durability and a smooth finish when selecting gel top coats and base coats products for your nails. This means they shouldn’t chip easily. Look for base coats that foster adhesion with your natural nails and gel polish, and tops that provide a strong and shiny seal. Trustworthy brands yield great results, so check the ratings and reviews before making a purchase. Also, make sure that the items you choose work well with thier gel polish and cure correctly under your UV/LED lamps.
The Significance of Using Quality Gel Base and Top Coats
A base coat that is appropriate for your needs along with a well fits top is crucial for a lasting and a professional looking gel manicure.Avoiding peeling should not be a problem given that gel polish can be properly affixed. Leaving the natural nails exposed and shielding them from damage along with preventing staining is equally important.
The top coat, on the other hand, adds another level of protection while increasing the durability of the manicure. It works to lock in the color, add either a high gloss or matte finish as preferred, as well as help resist scratches or chips. Altogether, these layers help increase the duration of a manicure, which keeps the nails looking polished and well-kept for weeks. Using the right products for base and top coat will achieve the desired results while minimizing the professional touch-up—frequent touch-ups will be significantly less with the right products.
Best Recommended Gel Base and Top Coat Products
- Best Beetles Gel Top and Base Coat set- Economically-priced for the budget wise. Strong scratch resistant, durable, and good adhesion.
- OPI GelColor Base Coat- Strongly recommended for worry-free wear and tear. Prolongs health to the nails, and gel polish application is neat and easy.
- Gelish Foundation Base Gel- Promises effortless application and sticking, great for reducing Manicure with Gel peeling.
- Seche Vite Dry Fast Top Coat- E-dry ultra gloss top which has unrivaled shine and protection. Ultra gloss is loved however, drying time is a must.
- CND Shellac Top Coat – This top coat is perfect for achieving salon-level shine on your manicure, and the perfection it adds to the manicure makes it last for as long as possible.
How to Apply Coat of Gel Polish for Maximum Durability
- Prepare Your Nails – Start by shaping your nails and gently pushing back the cuticles. Remove any oils or residue from the nail surface using a nail cleanser or alcohol wipe to ensure proper adhesion.
- Applying a Base Coat – Apply a quality gel base coat, putting a coat of it in a thin layer over each nail. Do the curing using a UV or a LED lamp as per the instructions given in the product. Make sure to seal the free edge of the nail and the flooding the cuticle area should also be avoided. Now, no matter how thin of a layer it is, but it should be even.
- Layer the Color – Better to apply multiple thin coats than one thick one. Each coat should be cured for the recommended time, and the cooling under the lamp should be done for every layer.
- Sealing with a Top Coat – With the color curing under the lamp for prescribed time, see that the caping of free edge is strictly maintained to ensure no chipping during curing for required time.
- Cleansing and Nourishing – After curing, any sticky residue can be removed with a lint free wipe soaked in nail cleanser, followed by application of cuticle oil to hydrate the area.
Reference sources
- “Nail damage from gel polish manicure” (2012):
- Key Findings: This study reported nail weakness, brittleness, and thinning in five subjects after using gel polish. The damage was linked to the removal process involving acetone and manual peeling.
- Methodology: Observational analysis of subjects who underwent gel polish application and removal.
- Source: [Journal of Cosmetic Dermatology]1.
- “The effects of gel-based manicure on pulse oximetry” (2019):
- Key Findings: Gel-based manicures can lead to overestimations in pulse oximetry readings, potentially delaying the detection of hypoxemia. The study suggests removing gel polish or using alternative monitoring techniques.
- Methodology: Experimental study analyzing the impact of gel polish on pulse oximetry accuracy.
- Source: [Singapore Medical Journal]3.
Frequently Asked Questions (FAQs)
Q: What is the basic difference between gel and regular polish?
A: Regular polish and gel polish differ mainly in the way they dry. While regular polish dries in the open air, gel polish needs to be cured with a specific UV lamp. In most cases, gel polish is known to have a longer lifespan than regular polish and offers a more polished look.
Q: How long do gel nails survive compared to regular polish?
A: You can expect gel nails to last around two to three weeks without getting any chips, an advantage over regular polish which typically begins to show signs of wear after a few days. As a result, more people have shifted towards using gel polish for manicures as it ensures long-lasting style.
Q: Is it possible that gel polish can harm your natural nails?
A: A gel polish can be harmful to the underlying natural nails if it is not inserted or taken out correctly. Procedures should be followed correctly, particularly using polish remover clips or consulting a professional nail technician, to avoid damaging the surface of the nail plates.
Q: What techniques are used for applying gel polish?
A: To apply gel polish, it is usually done in layers. First, a protective base coat is placed onto your natural nails. Then polish is added. Finally, a seal forming gel is applied on top. For optimal curing, each layer must be UV lamp cured for a few seconds while being subjected to a few seconds of lunp heating.
Q: Why is UV lamp important in a gel polish manicure?
A: UV lamps are meant to assist in the curing procedure; this is the part where hardening of the polish is done to each layer. Altogether with the other procedures done to the nails, these steps are done to help strengthen and protect the manicure.
Q: Is it possible for me to do my nails with gel polish by myself?
A: Certainly, gel nail kits meant for at-home use are available for purchase, and they typically come with all the needed nail products such as a bottle of gel, a uv lamp, and other tools. However, to achieve flawlessly polished nails, a certain amount of skill is required which is the reason why most people go to a salon to get their gel nails done.
Q: What is the indentation mark shellac and gel polish creates.
A: Gel polish has a brand line called Shellac which offers the benefits of both regular polish and gel, along with a glossy finish. Like all gel polishes, it has to be cured under a UV lamp and known to possess long wear.
Q: What are the steps to removing gel polish while protecting my nails?
A: The best method to take off gel polish while protecting your nail is via nail polish remover clips with acetone. It prevents damage to the top layer of your nail. Also, professionally getting it done at the salon is a great alternative.
Q: Why do people refrain from using gel polish?
A: Gel polish offers nails that are long in length with a finish which is resistant to chips along with a shiny top coat. To add to that, it can be customized differently by the person quite easily. Hence many people enjoy it.
Q: How does hard gel differ from gel polish?
A: While both products cure with the help of a UV lamp, there are different purposes they serve. Hard gel requires a thicker sculptable material for building nail enhancements and extensions, meaning it provides support for the structure of the building. On the other side, lighter gel polish is used only for adding color. Although both require UV curing, less structural support is offered by hard gel compared to gel polish.