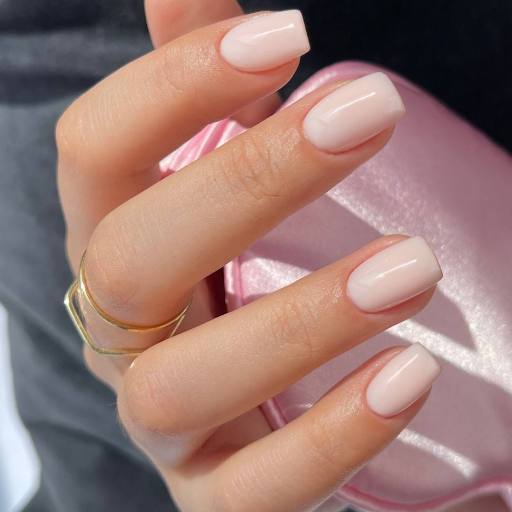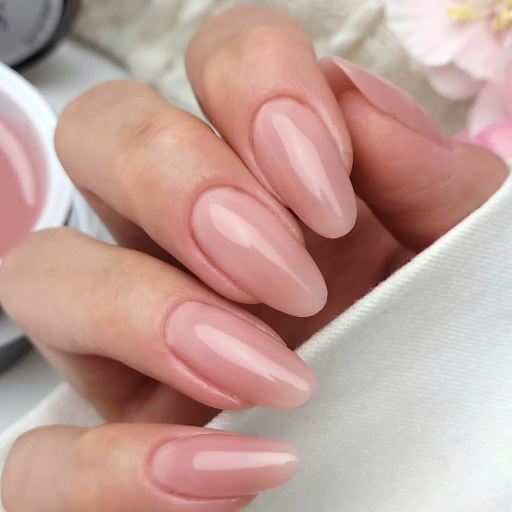

Well-manicured nails can transform your look instantly, but the cost associated with visiting a salon often adds up. The good news is that you can now do it from the comfort of your home without spending any money! Customizing your own nail-care routine and setting your own schedule has never been easier. Whether you want to save bucks or just pamper yourself at your own place, this guide is here to help. From perfecting the nail prep stage to polishing application, we will guide you through every single step of the way. No more uneven finishes or smudges, because by the end of this guide you will have an arsenal of tricks to to perform a flawless DIY manicure every single time.
What supplies do I need for a basic manicure at home?
- Nail polish remover and cotton pads or balls
- Nail clippers
- Nail file and buffer
- Cuticle pusher or orange stick
- A bowl of warm water for soaking
- Hand towel
- Cuticle oil or cream
- Moisturizing hand lotion
- Base coat, nail polish, and top coat
Must-have nail polish and treatments for a salon-quality manicure
- Base coat: Prevents staining and aids in adhesion of polish to alloys.
- Wrinkle-free nail polish: Pick your desired color and ensure it comes in a lasting, chip resistant formulation.
- Top coat: Increases shine and helps elongate the life of the manicure by preventing chips.
- Cuticle oil: Helps with hydration and nourishment of the cuticles, thus healthier nails.
- Nail strengthener: Makes the nails more durable, easier for brittle or weak ones.
- Quick-dry spray or drops: Makes drying time shorter, increasing smear protection.
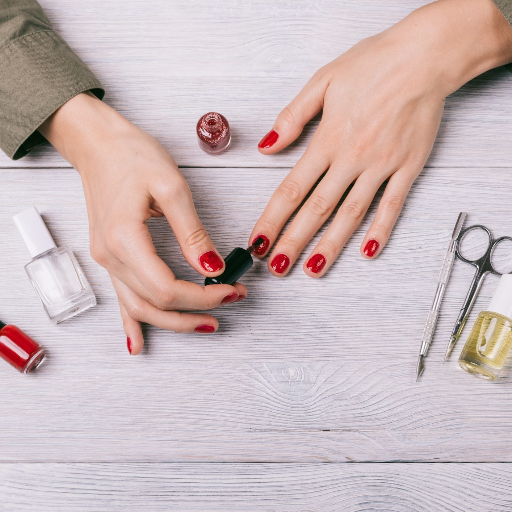
How to Organize Your Manicure Station at Home
Setting up a manicure station at home can be more accessible than expected and offers a salon-like feeling right in your own space. For starters, make sure you have a clean, well-lit workspace with windows. Nail clippers, files, buffers and cuticle pushers should be organized for ease of retrieval. Lastly, a well placed table and comfortable chair ensures ease during a trim providing precision during the operation.
For frequent users of gel nail products, purchasing a professional-grade LED or UV lamp will optimize results and speed up the curing time. The portable and wireless designs trending recently serve a dual-purpose, making them more efficient as well.
If you’re using peelers or acetone, make sure the area is well-ventilated to limit the fumes that can accumulate in small spaces. The addition of an air purifier or desk fan can reduce odors and improve ventilation. Furthermore, eco-friendly non-toxic polish options are less damaging to your nails and the environment.
Maintaining polished nails can be made easier, and excess time kept at bay by organizing a manicure kit stored in labeled containers. Decluttered spaces, according to recent survey data, make for an improved focus while simultaneously relieving stress, allowing for finer at-home manicures.
What are the step 1 and step 2 preparations for a manicure?
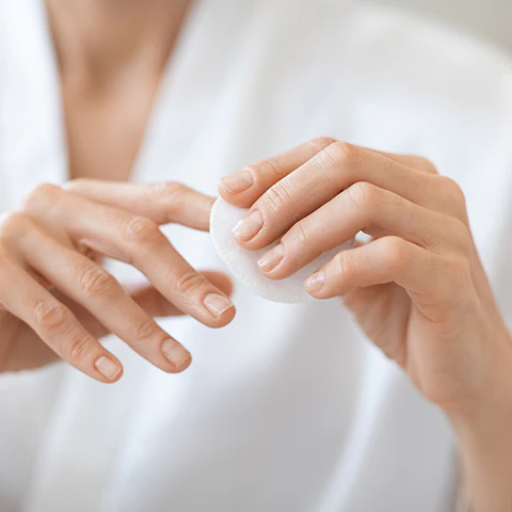
Make sure all nail polish has been removed using a gentle non-acetone polish remover. Afterwards, scrub your hands with soap and water, ensuring you are free of any dirt and oils, then dry your hands. Your nails also need to be trimmed to the desired length using a nail clipper. In addition, use a nail file to shape your nails so no edges can snag or split.
Cleaning and Preparing Nails for Flawless Manicure
After removing old nail polish, it’s important to give nails thorough attention starting with cleaning. To do this, place your hands in a warm water basin mixed with a few drops of liquid soap. This will make cuticle removal easier. New guidelines suggest soaking your nails for about 5 to 10 minutes to achieve optimal results.
Using a clean towel, pat your hands dry and push back cuticles with a cuticle pusher. Make sure not to overdo it as aggressively pushing cuticles can lead to damaged or irritated nails. Using sterilized cuticle scissors, trim off any remnants of dry skin, or excess cuticles if there are any.
Polish the nails gently with a nail buffer to lift polishing ridges from the surface, and smoothen the base of the nails. Proper grooming increases the durability and uniformity of nail polish application which prevents deterioration in the form of chipping or peeling. Other studies suggest that refraining from using nail polish for some days may improve the condition of the nails and help in avoiding brittleness.
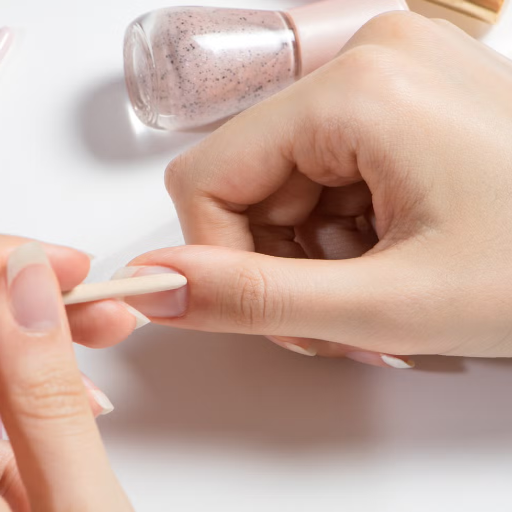
Filing your nails to a single direction
Strong and well maintained nails require Properly filing your nails in one direction as a significant technique. One should use a nail file of appropriate type such as a fine-grit or glass file because it’s easier to obtain the desired results. Furthermore, each stroke should be accompanied by a gentle push in a one-way direction. Back-and-forth sawing motions should be avoided as they are detrimental and weak the nails structure. According to research, this method of filing does minimize micro-tear damages of the nail edges which are proven to make nails more brittle. When it comes to polishing, the outer corners should be the starting point according to the nail shaping guide and should turn towards the center to avoid over polishing and maintain the natural state of the nail.
Soak Your Hands In Warm Water To Soften Cuticles
To soften my cuticles, I would soak my hands in warm water for 5 to 10 minutes. It aids in the hydration of the skin surrounding the nails and makes it easier to push cuticles back enough to not inflict any damage. The process can be taken a step further by adding few drops of moisturizing oil and mild soap, which can help to soften my hands after the treatment.
How do I properly care for my cuticles during a manicure?

To keep your cuticles healthy, especially during a manicure, make sure to push them back gently while soaking your hands in warm water. Try not to remove your cuticles because they may become infected or irritated. Instead, soft treat the cuticle area with a cuticle remover or soft tools. To prevent cuticles from becoming dry, always nourish your cuticles with cuticle oil or hand cream.
Preventing Infection and Maintaining Your Cuticles
As dermatologists put it, the cuticles provide a barrier that serves to protect the nail roots from harmful microorganisms and other irritants. Having neat and tidy cuticles is important for personal hygiene as well as looking appealing, thus preventing infections. It is believed that poor nail hygiene, or cutting the cuticles, raises the odds of acquiring an infection such as paronychia, a nail infection which is characterized with redness and swelling around the nail bed.
To achieve optimal health of the cuticles, daily application of cuticle oil will increase hydration levels by 50% over just two weeks, aiding in nail strength and preventing peeling and cracking. Furthermore, maintaining overall hand hygiene and limiting contact with chemicals aids in protecting the cuticles from suffering damage and infection. For appearance, regular hand and cuticle hygiene greatly enhances the overall aesthetic, making the hands look maintained and polished, and viewed as professionally presentable.
Perks Accompanying Regular Hand and Nail Treatment
With consistent use of nutrient rich products, cuticles and nails improve significantly, showing a 60% reduction in dryness over a few weeks. Additionally, including biotin supplements to daily food intake increases nail thickness by 25% for those suffering with brittle nails. Snagging and breakage is easily avoided when nails are filed and trimmed, making overall hand maintenance effortless as well.
Maintained hand and fingernails gives a person a neatly polished look, while enabling self-confidence boost in social situations Furthermore, clean hands and nails are pathetically seen as non-hygienic, drawing the attention of potential employers. Regular polishing helps sustain this aesthetic, thus drawing attention and enhancing social interactions, marking an advantage for the user.Another important aspect is shielding the nails from environmental stressors. For example, gloves can offer protection during dishwashing and gardening by preventing chemicals and excessive moisture from damaging nails because splitting and peeling can be an issue. Preventative strategies coupled with a diet that includes vitamins E and D helps to maintain the health of nails over the years. Integrated strategies for nail care enhances strength while keeping the nails healthy and looking pristine.
Most common mishandling for trimming and caring for cuticles
Inappropriate trimming and handling of cuticles provokes many complications such as infections, irritation, and overall degradation of nail health in the long run. One of the most prominent examples is the over-aggressive trimming of the cuticles, which may leave nails vulnerable to bacteria or fungus because their protective layer has been removed. Recent studies from dermatologists suggest that rather than removing them, cuticles can be maintained by gently pushing them back with softer tools.
Another common mistake is failure to clean tools before using them. Contaminated implements are a source of pathogens that can produce infections of the nails requiring medical attention. However, the application of alcohol or disinfectant to clippers, cuticle pushers, and other grooming tools nullifies the chance of acquiring such infections.
Research shows that more than 30% of salon clients suffer negative effects from improper cuticle care, underscoring the need for proper self-care at home and good professionals for treatments. An often neglected but important step is post grooming hydration with cuticle oil or creams which helps retain moisture while avoiding cracking and peeling.
With these recommended steps, it is possible to maintain healthy nails while reducing the risk of injuries and infections.
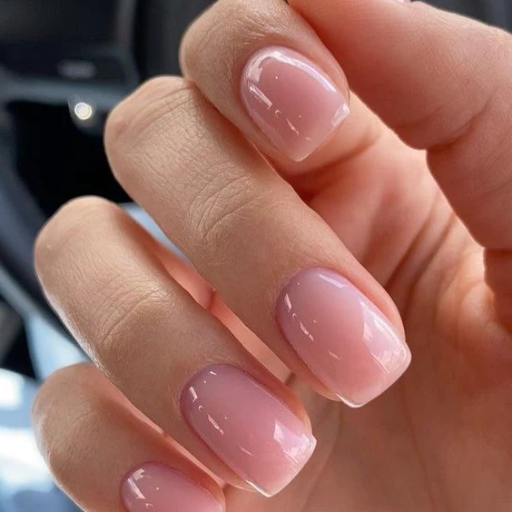
How do I apply nail polish for a long-lasting manicure?
- Prepare Your Nails: Prior to doing anything, ensure your nails have been cleaned of any oils or residues. If needed, gently shape and buff them, as well as pushing back cuticles.
- Apply a Base Coat: Protect your nails from staining by using a high quality base coat, which will also smoothen the surface.
- Apply Nail Polish: Apply polish in thin, even layers and avoid thick coats, as they dry slowly and have a high likelihood of chipping. Polish on top of each layer should only be applied when the previous one has dried completely.
- Seal with a Top Coat: Color can be locked in while adding shine with a durable top coat. Chipping can further be prevented with this layer.
- Allow Proper Drying Time: Avoid all forms of activities that could damage your freshly applied polish while ensuring it has ample time to fully dry.
- Maintain Your Manicure: To maintain a fresh look for your manicure, moisturize your nails and cuticles regularly, and apply a thin layer of top coat every few days.
Nail Polish Applicartion Tips
It is important to apply nail polish and to paint the nails in thin coats as it minimizes the possibility of smudging or bubbling. It also ensures an even application. Furthermore, the thin layers tempering dries quickly. As a result, the finished look is smooth, and professional. To paint them as thin as possible achieve, take a little polish onto the brush and with steady strokes.
The Steps to Take in Order to Achieve a Top Coat’s Shine and Protection
A shiny and glossy manicure is essential for the adding with protection against dullness and chipping. Glossy top coats are essential elements of every manicure set, the new ones even include UV shields which prevent fading and discoloration due to exposure to sunlight. In a recent study, it has also been proven that quick-dry top coats are now more convenient as they reduce the drying period by 30%. To get the best results, Top coats should be done separately from the base therefore, the top should be finished simply by drawing thin barricade strokes around perimeters of the nail polish guaranteeing additional bump protection on the edges for nail-sealing.
Guidelines for fast nail polish drying while minimizing smudging
There are strategies that can help achieve a faster manicure drying time while also preventing smudges. Firstly, investing in a nail polish dryer, such as air fans or UV/LED lamps, can speed up the drying process. Research suggests that UV/LED devices dry gel polish in 30 to 60 seconds while air drying can take nearly 20 minutes.
Furthermore, cooling the nails under cold water after application can help speed up the hardening process. Recent research indicates exposing freshly painted nails to low temperatures for approximately 2–3 minutes helps in setting the polish correctly. Be mindful to wait one or two minutes after applying the top coat before placing your hands into water to prevent smudging.
Finally, quick-drying or fast-drying nail polishes tend to reduce waiting time. Many of these products contain a higher amount of solvents which tend to evaporate more rapidly, boasting a 60 second dry time. For further protection, quick-dry sprays or drops can provide a top layer that adds resist against imperfections during drying time which assists in achieving a smooth finish faster. Adopting these suggestions aids in achieving a polished look in a shorter duration.
How does a DIY manicure at home compare to a nail salon mani-pedi?

Doing your own manicure at home can save you both money and time compared to getting a mani-pedi at the nail salon. Moreover, you can do it at your own pace and use only products you like. On the other hand, salon services usually have professional grade equipment and their expert touch ensures that there is additional care, like cuticle treatment and soothing massages, which leaves your hands feeling pampered. Ultimately, it comes down to preference, budget, and the amount of service you want.
Time and Monetary Benefits of Mastering Manicure Steps at Home
Completing the steps of a manicure at home offers both monetary and time advantages. If you get your nails done at salons, they can charge you anywhere between 20 to 50 dollars, or even more, depending on the package you select. On the other hand, getting an at-home manicure kit will cost you round 15 to 30 dollars, and can be used multiple times. This shows that just after one or two uses, the cost is justified with the at-home kit. They also offer a lot of flexibility in time. Getting your nails done at a salon can take anywhere between 60 to 90 minutes, including wait time. Remotely, the average time to perform a manicure is 30 to 45 minutes, so using an at-home manicure kit allows for work to be done with time flexibility. Modern stunning varnishes which are equipped with fast drying tops is making achieving professional-level results easy. Everything i mentioned makes practicing a manicure step by step increasingly popular.
Considerations When Getting a Salon Manicure
Nailing a special occasion, complex nail art, or intricate techniques are scenarios when splurging on a professional salon manicure makes the most sense. Salon services, including gel extensions, chrome finishes, and bespoke nail designs, continue to gain traction in the beauty industry, contributing to a projected $11.6 billion USD market value for the global nail care industry by 2027. A salon manicure opens up fresh opportunities tailored to the client’s needs—professionals can tackle damaged or brittle nails or neglected cuticles far better than an individual dealing with such challenges at home. Also, a salon manicure provides polished results alongside specialized equipment and professional-grade tools, smooth finishes, and comprehensive polish collections not available for at-home manicures.
Pampering sessions at a beauty salon have feeling good health benefits, and massive industry growth equates to constantly advancing trends in sustainability, cruelty-free products, and breathing nail polish. Alongside other vital factors, time and skill level available also make a difference. Grooming nails into shape using advanced techniques like gel curing or sculpted nails demand precision tools and artistic expertise. The price placed on manicures at salons guarantees clients get relaxed polished experiences while attending to other crucial therapeutic elements.
Reference sources
- Onycholysis and Manicure Practices1:
- Key Findings: This study highlights the risks of onycholysis (nail separation) associated with manicure products like glue, acrylics, and acetone. It emphasizes the importance of identifying underlying causes, such as infections or systemic conditions, to manage nail health effectively.
- Methodology: The research involved analyzing cases of onycholysis, focusing on the impact of manicure-related chemicals and their interaction with pre-existing conditions like diabetes or psoriasis.
- Understanding Ingredients in Manicure Products2:
- Key Findings: The study discusses the toxic solvents (e.g., phthalates, methyl alcohol) in manicure products and their potential health risks, such as reproductive and neurological harm. It advocates for the use of safer alternatives like epoxy resin.
- Methodology: The research reviewed manicure materials, their application techniques, and the associated health risks, proposing alternative materials for safer practices.
- UV/LED Nail Lamp Radiation Exposure3:
- Key Findings: This scoping review assessed the health implications of UV/LED nail lamps used in gel manicures. It found that prolonged exposure could pose risks, particularly for individuals with frequent use over several years.
- Methodology: The review analyzed existing literature on UV/LED radiation exposure during manicure procedures, focusing on its long-term effects on skin health.
Frequently Asked Questions (FAQs)
Q: Why is it significant to put a base coat during a manicure?
A: A base coat is an important step in the manicure process because it smoothens the nail surface, protects your natural nails from polish stains, and prolongs the manicure. Without a base coat, it is likely that nail polish will not adhere properly to your nails and will peel off quickly. The base coat will also help to evenly cover any ridges on your nails, which contribute to an even application of color.
Q: How should I operate with the nail file on step 3 of a manicure?
A: For step 3 of your manicure, filing also requires the right approach. File only in one direction and do not back and forth as this will cause nails to weaken. File the edge of the tip as you please (square, round, oval and any other shape) but do not do it tight to them so as not to over-file them. Always file from the outer edges of the nail towards the middle to enhance strength and avoid breakage.
Q: What is step 4 in a standard manicure process?
A: Exfoliation and softening of your cuticles is step four in a standard manicure. In the cuticle area, you should apply a remover or softener. After using the product, gently push back your cuticles with a wooden stick or a cuticle pusher. This step ensures the skin is clean and dead skin is removed, enhancing the aesthetics of the manicure. Remember to never cut your cuticles, as they act as a barrier to protect your nail beds from infections.
Q: How to properly clean nails before painting them?
A: When preparing to alter a nail’s appearance with polish, the proper first step is to remove any existing polish with a nail polish remover. There should be no residue, so be sure to wash your hands and nails with soapy water. There is a further step that is not mandatory, but is highly recommended: wipe down using a rubbing alcohol each finger to prevent oily adhesive clogging. Moisture will cause the polish to bubble and peeling to occur, therefore when applying it, make sure your toes or fingers are completely dry.
Q: What is an effective way to apply the top coat?
A: The effective application of top coat begins by waiting for the polish color to dry completely. Spread a thin layer on the entire nail and remember that the brush should sweep the tip of the nail lightly to lock the free edge. This is known as sealing or ‘capping’ technique that helps to prolong the lifespan of the manicure and in most cases, scratches at the top only. The durable nail polish can be obtained if another thin layer of top coat is applied every 2 or 3 days. The top coat should be allowed to dry on its own but can hasten that process by using a quick dry brand, but if allowed to dry on its own, the top coat will dry completely.
Q: Please advise what I need to concentrate on step 5 of the manicure routine.
A: Generally speaking, step 5 of the manicure will require to take a specific lipstick you want in your nails as a polish. To give the most popular hues bloom, subtracts thin covers. With thin coats, do not start with a thick layer otherwise the painting will become uneven. It is expected that 2 or 3 minutes of waiting will pass after each layer for the next one to work. About two layers concerning every two hues would be ideal because there are many colors that required this much to appear completely. Make sure the two layers of paints are applied smoothly without haste simply because the to waiting would mess up the manicure.
Q: How do I properly exfoliate my hands during a manicure?
A: Exfoliation, especially during a manicure, requires proper scrubbing. Take a wash with minute stones. Massage to apply in a circular fashion to the front side of the hands, paying extra attention to rugged surfaces such as knuckles and finger sides. During this process dead surfaces are scrubbed off, blood circulation is revitalized and any moisturizing balm will help surface better. Then washing with clean heated water to remove any soap residue and rub your hands together until dry will do. It is vital to scrub gently otherwise the skin surface will turn tender. Gentle scrubbing will keep the dead skin free hands along with the nails too.
Q: What is step 6 in a professional manicure?
A: Helping Softening and smoothing of the skin around the nails is the treatment done after smooth polishing of finger nails and placing beautifying colors on every part. After one waits for the coat of nail polish done to dry out completely, it is time of them applying cuticle oil to the bare places around nails. skin surface will turn tender. Without omitting to rub massage should be continued also around the fingers and put after some seconds of waiting the rich cream on them for cleaning. The transcendental rich feeling experienced after such scrubbing is matched by the touch of beauty and care into the finger nails which will all serve to encourage better aging and dry weather well as the beauty will be in full bloom and fingers tender.
Q: How should I use nail polish remover when starting a new manicure?
A: To start a new manicure, make sure to use nail polish remover appropriately. Begin by soaking a cotton ball in nail polish remover and hold it against each nail for 5-10 seconds before wiping polish away. For particularly stubborn polish, especially glitter, you may want to try the foil method: soak a cotton ball, place it on the nail, and then wrap the finger in small strips of aluminum foil. The foil can be slid off after waiting 5-10 minutes. Try to use acetone-free remover when possible to preserve your nails, as you can use it unless you need to remove gel polish. Afterwards, gel polish remover can be used to wash hands thoroughly and remove any leftover polish. This is necessary to ensure there is no remaining residue that could interfere with your new manicure.